Welcome! Today I will be showing you how to create a shop system in your flash games with the use of ActionScript 2.0.
Let's start by creating a new AS2 Flash document.

For this tutorial, you will only have 4 things in your library. 3 of the 4 are buttons named "item1", "item2", and "item3". The other thing is also a button named "purchase_btn". You will need to create these now. Just select each item individually, and convert them to a symbol (button) by pressing F8 on your keyboard or right clicking them and selecting "Convert to Movie Clip".

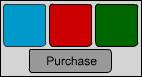
The picture above are the 3 items I created, and my purchase button. You are now done with making the library items.
Now we need to add several Dynamic text boxes. There are 7 total for this tutorial.
Here is a list of the ones you will need and their Instance Names or Variables. The ones highlighted in blue are Variable Names, and the ones in red are Instance Names.
Money - "money"
Cost of Item - "cost"
The Item's Name - "itemName"
Shop Message - "msg"
Amount of Blue Squares - "blueSquares"
Amount of Red Squares - "redSquares"
Amount of Green Squares - "greenSquares"
Here is a visual display of the textboxes:
Do not put any text inside the textboxes, I just wanted to make it clear which ones were which.

Now that we have named our Dynamic textboxes, we can start adding code.
In the first frame, we need to determine how much money we want to start out with, and how many of
each item we have in our inventory. So in the frame's actions, type this:
money=100;
blueSquares=0;
redSquares=0;
greenSquares=0;
We have now set what we want for each value. Now we need to add coding that lets us purchase items. On the purchase button, type this:
on(release){
if(_root.itemName.text=="Blue Square" && _root.money>=10){
_root.money-=10;
_root.blueSquares+=1;
_root.msg.text="You have bought 1 Blue Square."
}else
if(_root.itemName.text=="Red Square" && _root.money>=20){
_root.money-=20;
_root.redSquares+=1;
_root.msg.text="You have bought 1 Red Square."
}else
if(_root.itemName.text=="Green Square" && _root.money>=30){
_root.money-=30;
_root.greenSquares+=1;
_root.msg.text="You have bought 1 Green Square."
}else
if(_root.itemName.text=="Please select an item."){
_root.msg.text="You have not chosen an item!"
}else{
_root.msg.text="You don't have enough money!";
}
}
_root.money-=10;
_root.blueSquares+=1;
_root.msg.text="You have bought 1 Blue Square."
}
Each of these "if" statements is checking to see if 1, we have selected the Blue Square item as indicated by the "itemName" textbox, and 2, if we have enough money to purchase the item.
You will notice that after each "if" statement, there is an "else" action. This means that, if the function above is false, (if we do not have enough money/item not selected) then check for this function, and if this function is not true, check the next function.
if(_root.itemName.text=="Please select an item."){
_root.msg.text="You have not chosen an item!"
}else{
_root.msg.text="You don't have enough money!";
}
The "if" statement here is saying that if we have not selected an item at all, let the user know that he/she has not selected an item from the shop.
The last line is the last function that is checked, that lets the user know that they do not have enough money to purchase the item.
The last coding we need is simple, we just need to be able to click on an item and display the cost and name of it. For each item, type this:
on(release){
_root.cost=10;
_root.itemName.text="Blue Square";
}
You can change the cost and name to whatever you want, but make sure that the "itemName.text" matches the same text you put in the coding for the purchase button.

That does it! If you need help understanding the code or anything dealt with in this tutorial, please download the source file. It will help you! Thanks for viewing this tutorial!
Source file available here: http://adf.ly/3LnLS
No comments:
Post a Comment